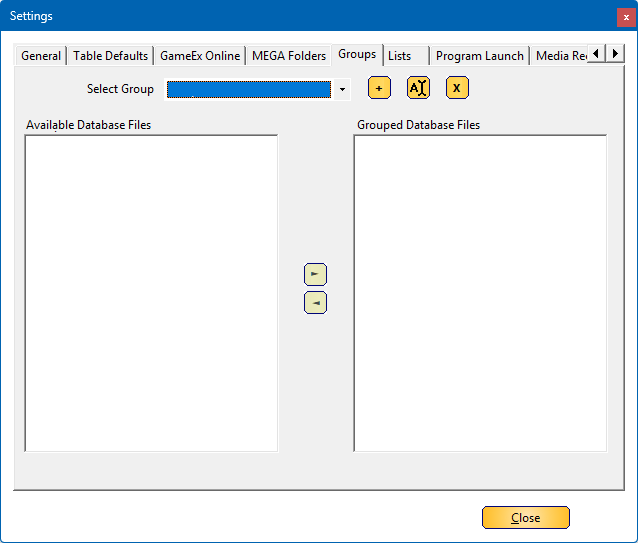
Within the Groups tab, you can create a group that will be displayed in the front end under the Lists menu entry.
A group allows you to combine multiple (custom) database files into a single, organized collection.
Additionally, you can create groups that span multiple systems, providing flexibility in managing and accessing different media or configurations.
Below is a detailed breakdown of the settings for this section:
 |
¶ Select groupHere you can select a group that you already created and wants to modify/delete |
 |
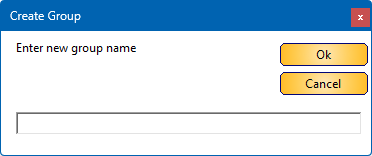 ¶ Add groupClick on this button if you want to create a new group of systems |
 |
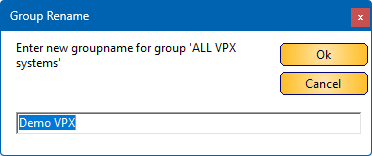 ¶ Rename GroupClick on this button, to rename a group (name will also be changed in the front end |
 |
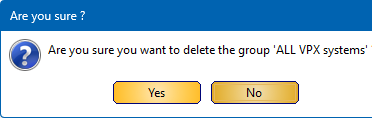 ¶ Delete groupClick on this button to delete a group. |
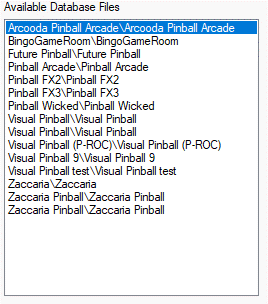 |
¶ Available DatabasesWhen a group is selected in the ‘Select group’ box, all your databases will be showed in the available databases (All systems, and custom databases) |
 |
¶ Add to grouped Database FilesDouble click in the available database files or select a database and use ► button to add then to Grouped Database Files |
 |
¶ Remove from grouped Database FilesDouble click in the Grouped Database files or select a database and use ◄ button to remove the database from the list |
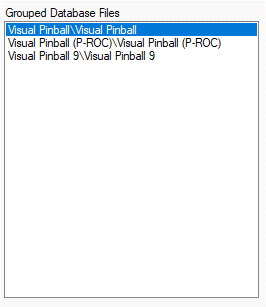 |
¶ Grouped Database FilesThe selected databases that will be combined to the group |
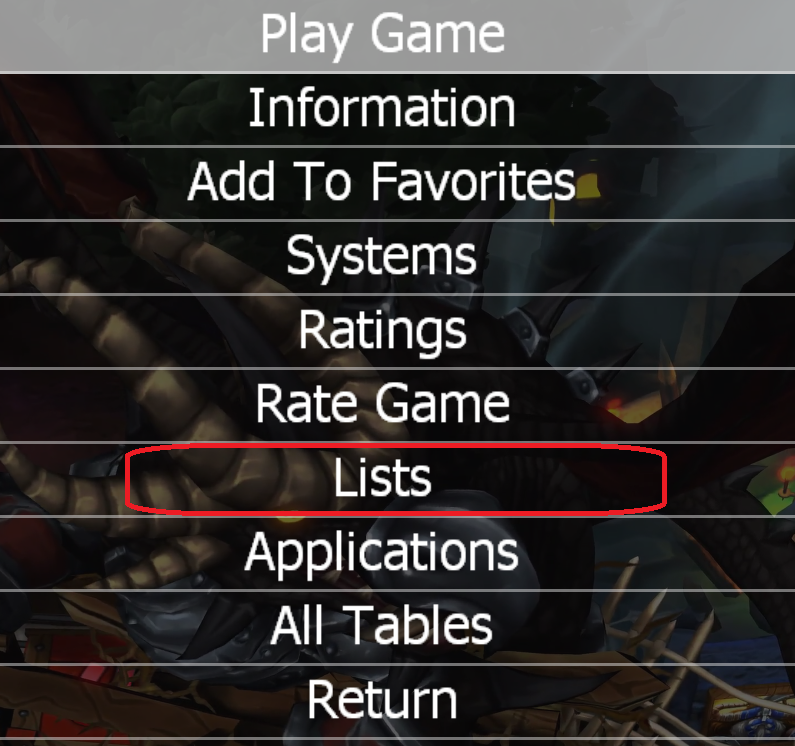 |
Within the PinballX front end, you can bring up the menu entry, scroll to Lists and hit the select button |
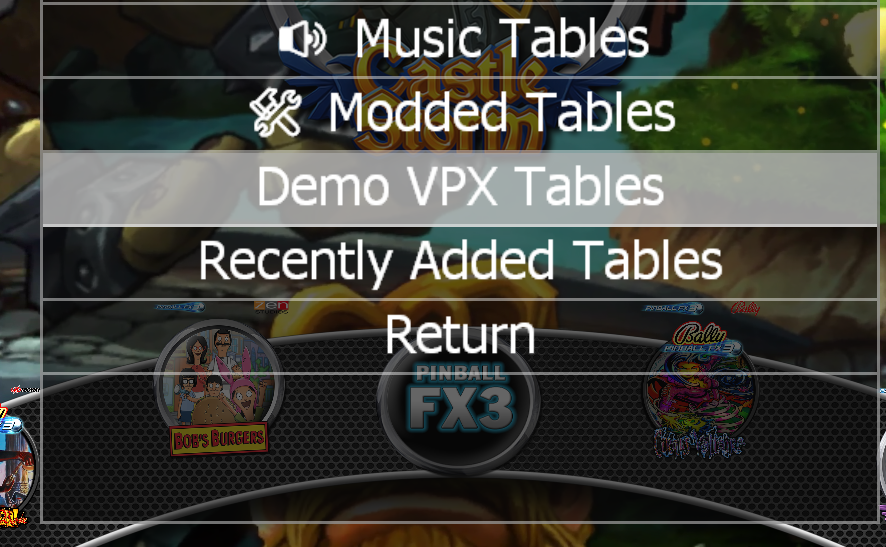 |
In the list menu, you can now choose your group (‘Demo’ VPX’ in my example) and click on the select button, it will show all the 3 systems combined |